Set Appliance State:
| Isolate Mains Power to appliance as per TOPs P4 |
GC No. 47 044 04
Removal of Front Case
(a.) Turn the plastic screws located to the left and right of the control panel (as indicated by the red arrows)
and lower the panel forward and down.
(b.) Slide the front case forwards and lift off.
(c.) Remove the clips at the top and bottom of the
inner front case and lift off.
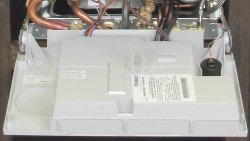
Remove the PCB cover
(d.) Release the clips as shown in the photograph and lift off cover. Note: cover is in two parts. The rear half should be removed first then the front half.
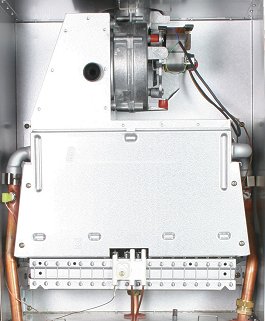
Removal of Combustion Chamber Cover
(e.) Remove four screws securing combustion chamber front cover (as indicated by the red arrows).
(f.) Lift combustion chamber cover out from the bottom
to clear of top retaining lugs and pull downwards.
Removal of Front Case
(a.) Turn the plastic screws located to the left and right of the control panel (as indicated by the red arrows)
and lower the panel forward and down.
(b.) Slide the front case forwards and lift off.
(c.) Remove the clips at the top and bottom of the
inner front case and lift off.
Remove the PCB cover
(d.) Release the clips as shown in the photograph and lift off cover. Note: cover is in two parts. The rear half should be removed first then the front half.
Removal of Combustion Chamber Cover
(e.) Remove four screws securing combustion chamber front cover (as indicated by the red arrows).
(f.) Lift combustion chamber cover out from the bottom
to clear of top retaining lugs and pull downwards.


Isolate as per TOPs P4
and refit as necessary